

User Guide
ConfettiEdits is a Windows desktop application that helps you pare down your existing specifications to be project-specific specifications through an automated question-and-answer system. The software includes a Microsoft Word Add-In to streamline the color-coding process during template creation.
Software Components
ConfettiEdits Desktop Application: The main program where users answer questions and developers build templates.
Word Add-In: A Microsoft Word ribbon that provides tools for color-coding your master specifications. The Add-In helps developers quickly apply colors, validate bracket sections, and export color information during template preparation.
Quick Overview of ConfettiEdits
One-time setup:
- Color Code Your Master Specifications
- Take your existing master specifications and identify content that might need removal
- Change the font colors of different content to encode them
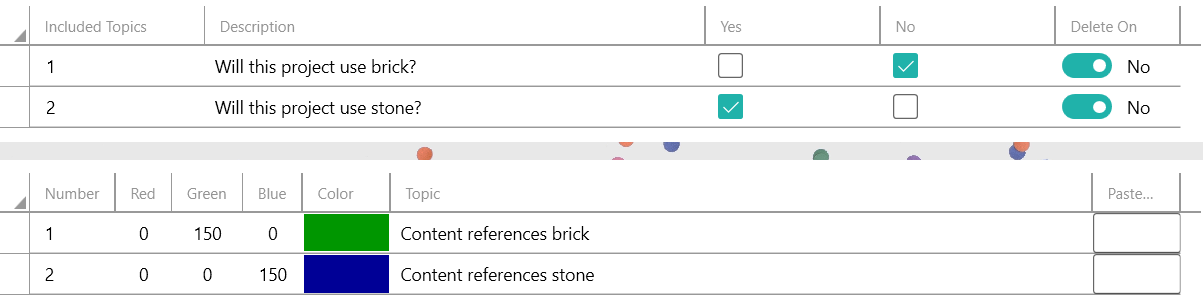
Example: In a masonry specification, you might mark all mentions of “brick” in green and all mentions of “stone” in blue.
- Create Topics
- In the program, describe the color and description of the content and assign a topic number
Example:
Green font = Topic 1 = “brick” content
Blue font = Topic 2 = “stone” content
- In the program, describe the color and description of the content and assign a topic number
- Create Questions
- Create yes/no questions about each topic
- Link questions to their corresponding colors and topics
Example: Create the question “Will this project use brick?” and link it to Topic 1. Create “Will this project use stone?” and link it to Topic 2. - Determine if user’s yes/no responses should keep or remove content
- Create New Master Specifications
- Create new master specifications that return the specification to black font, but keeps the encoded information
- Distribute the new master specifications to your team
Typical use:
- Answer Questions
- Users answer the yes/no questions for their specific project
- Get Clean Document
- System processes the document based on user responses
- Creates a new specification with items marked for deletion in red
- Document is ready for manual review
Example: The final specification will show only brick-related content in red text, with all stone-related content shown in black.
ConfettiEdits Modes
ConfettiEdits operates in two distinct modes:
User Mode: This is the typical operating mode. In User Mode, users answer yes/no questions to customize their master specifications according to their project needs. The program defaults to User Mode upon opening.

Developer Mode: Primarily used to create templates. In Developer Mode, administrators can prepare specifications and build the question templates that typical users will interact with. Template creation and editing functionality is only accessible in this mode.
The interface consists of two main components:
- The User Grid (top grid)
- The Developer Grid (bottom grid)

Preparing Your Master Specifications for ConfettiEdits
To begin setting up your specifications for ConfettiEdits:
- Examine your master specifications to identify any sections that may need removal in specific project versions
- Select distinct font colors for each piece of removable content
- Use your chosen colors consistently throughout all master specification documents, maintaining the same color scheme across different Word files
Example: If your master specifications include requirements for different states, each state’s content should be marked in its own unique color. You could mark all Ohio-specific requirements in one color, Illinois requirements in another, and so on.
Using the Word Add-In for Color Coding
Overall Purpose
The Word Add-In provides tools directly within Microsoft Word to help you color-code your master specifications. It simplifies the preparation process by offering quick coloring tools and validation features.
Ribbon Buttons:
- Color Brackets – Automatically colors all bracket pairs […] throughout your document with unique colors. Skips brackets that already have color and offers an optional review step.
- Random Color – Applies a unique color to selected text. Each click generates a different color that’s safe for ConfettiEdits.
- Black – Removes color from selected text (returns it to black).
- Pipette – Copies the color from the character at your cursor position so you can reuse it elsewhere.
- Apply Color – Applies the last color you used (from Random Color or Pipette). If text is selected, it paints that selection. If no text is selected, each click expands the color outward from your cursor: first to the current word, then the sentence, then the full paragraph. The counter resets when you use Random Color, when you paint a selection, or when you move your cursor to a different word.
- Open ConfettiEdits – Launches the main ConfettiEdits program.
- Identify Color – Displays the RGB values of the character at your cursor.
- Export Colors – Scans your document and creates a CSV file listing all unique colors with sample text.
- Help Guide – Opens the ConfettiEdits user guide.
- Suggest Improvement – Opens the contact/feedback page.
Color Coding Documents without Word Add-In
You may color code your document without using the Word Add-In. You select text and manually choose a color from Word’s font picker.
Key Color Selection Guidelines:
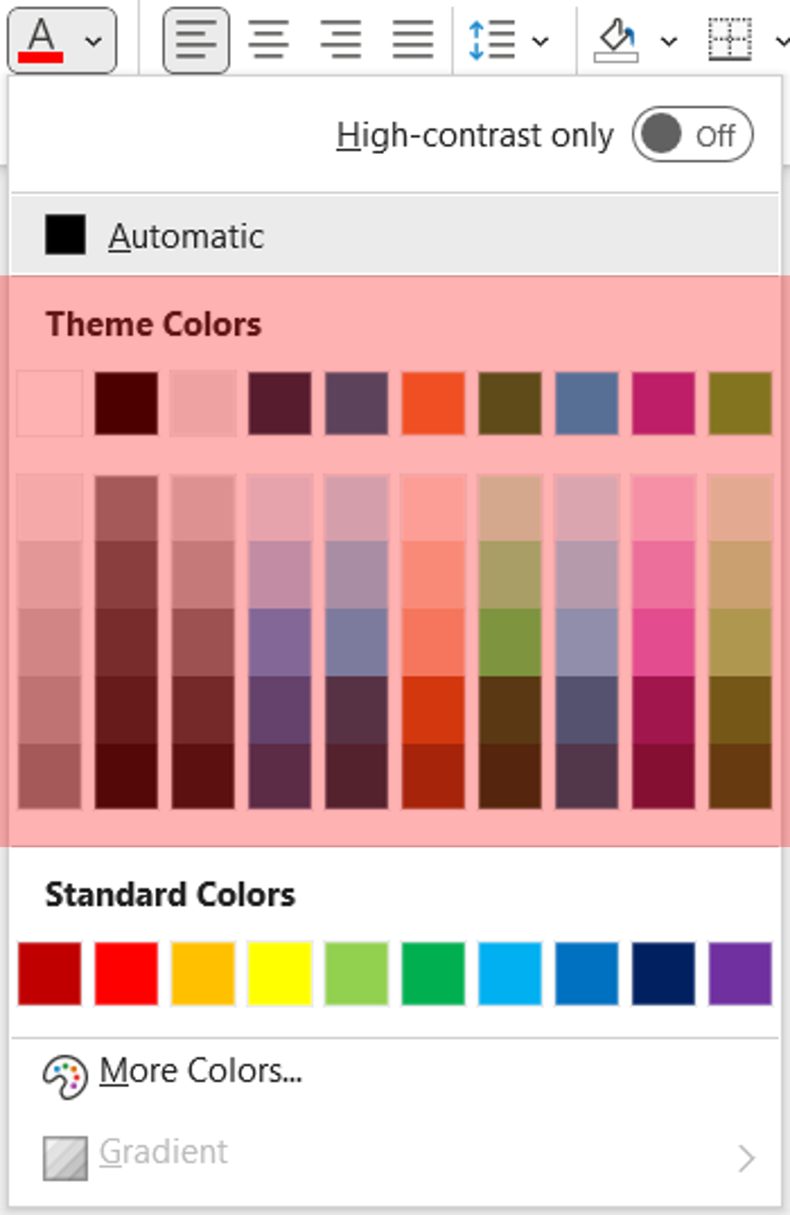
- It is recommended you open the font colors drop down, select “More Colors” and select a random standard or custom color.
- For best visibility, avoid fluorescent colors when using Microsoft Word with white backgrounds. Choose high-contrast colors for visibility – dark reds, blues, and greens work well.
- When marking the same type of content across different documents, always use the same font color. For example, if you mark plumbing requirements in blue in one document, use that exact same blue for plumbing requirements in all other documents.
Color Restrictions:
The program cannot use all colors.
- The program cannot process colors that are too similar to pure red (255,0,0) or pure black (0,0,0)
Note: The system will alert you if you’ve used any restricted red or black shades prior to running the program or saving the template. This alert will prevent you from saving the template or running the program. - Microsoft Word Theme colors (found in the Font color pulldown menu) are not compatible with the program because these colors can change appearance when documents are opened on different computers or when Word themes are modified. The program needs consistent RGB colors that remain exactly the same across all computers to properly identify and process content. Instead of using Theme colors, use specific RGB colors by selecting ‘More Colors’ from the Font color menu.
Note: Theme colors can only be detected after running the program, not during template saving. If you receive a theme color alert while processing your documents, return to your original specification and change any flagged text to a random RGB color, then run the program again.
Templates
Templates serve as the foundation of ConfettiEdits, allowing you to:
- Create customized questions about your specifications
- Store your questions and topics in a reusable format
- Share standardized question sets with your team
Templates are save files that contain two key components:
- A set of yes/no questions that users will answer
- The color encoding information that connects those questions to specific content in your master specifications
Templates are built around your color-coded content. Each set of specifications that needs different questions will require its own template. This could be driven by departmental divisions, specification types, or any other organization principle that makes sense for your content.
Example: An engineering department might need a template focused on mechanical or electrical specifications, while an architectural department might need a template for their architectural specifications. Creating separate templates for each department helps keep the questions focused and relevant to their specific needs.
To create a new template:
- Enter Developer Mode through the file menu
- Select “New” under the template options
- Use “Save As” to store the template in a network-accessible location
Save and share the template location where all team members can access them, as they’ll need these files to use the program. Users will load templates into their program in order to use the program.
Note: All template-related functions remain hidden until Developer Mode is activated through the file menu. This separation ensures that typical users can focus on their specification customization tasks without getting overwhelmed by template development features.
Creating Topics
Streamlined Color-Coding Workflow with the Word Add-In
The Word Add-In provides an efficient way to transfer your color-coded content into ConfettiEdits:
Export and Import Process
- Color-code your specification in Word using the Add-In’s coloring tools (Random Color, Pipette, Color Brackets, etc.)
- Export Colors – Click this button in the Word Add-In to scan your document and create a CSV file containing all unique colors with sample text.
- Import CSV in ConfettiEdits Desktop – Open your template in Developer Mode, navigate to the desired tab, and choose Import CSV. Import CSV offers two options: Colors Only – Brings the colors into the Developer Grid. The program will::
- Check each color in the CSV against colors already in the Developer Grid
- Skip any colors that already exist (prevents duplicates)
- Add new colors to the bottom of the grid on the active tab
- Automatically populate the Topic column with the first 5 words of the sample text
- Leave the Number column blank for you to assign topic numbers
- Build Questions – Does everything Colors Only does, and additionally reads the bracket structure from the exported document to draft a grouped, indented set of questions in the User Grid. Related bracket sections and their surrounding headings become nested question rows, so the questionnaire arrives organized instead of blank — you prune and rephrase rather than authoring from scratch.
- Review and refine – Edit the auto-generated Topic descriptions for clarity and assign topic numbers to each color.
Manually Entering Topics
If you do not use the Word Add-In, first, you’ll work with the Paste Text column. Here you can either copy colored text directly from your specifications and paste it in, or manually enter the Red, Green, and Blue color values for your selected color. The color will automatically display next to the RGB values for verification. The pasted text will automatically appear in the Topic column. The text can be overwritten.
Tip: If the pasted text is not being recognized by the “Paste Text” column, try backspacing the last characters until it is accepted. Text with multiple colors will not be accepted.
Next, use the Topic column to describe what the color represents in your specifications. For example, you might enter “References to State of California requirements,” “Division 01 specification content,” or “2024 Plumbing Code requirements.” This description helps describe content in your specifications.
In the Number column, assign a unique identifier to each topic. These can be any non-zero positive integers (1, 2, 3, etc.). These numbers will be referenced later in the User Grid section to link questions with their corresponding topics.
Finally, the Tags column lets you assign one or more tag names to a color row. Tags are optional labels — short names like HVAC or Concrete — that you can reference in the Included Topics column of the User Grid instead of topic numbers. Separate multiple tags with commas. When a tag name appears in the Included Topics column, ConfettiEdits expands it to all color rows on the same tab that carry that tag. Tags are tab-scoped: a tag named Steel on Tab 1 only matches rows on Tab 1.
Adding and Managing Rows
You can modify both the User and Developer Grids in the following ways:
Adding Rows:
- Select an existing row in either grid
- Click the Add Row button
- A new row will appear below your selection
Deleting Rows:
- Highlight the row you want to remove
- Press the Delete key on your keyboard
Inserting Rows:
- You can add rows between existing entries
- Select the row above where you want the new row
- Click Add Row
Find Row:
- Find Row lets you jump straight to the Developer Grid row for a given color by pasting colored text, instead of matching RGB values by hand.
- Copy a piece of colored text from your specification in Word
- Paste it into the Find Row box in the Developer Mode toolbar
- ConfettiEdits reads the font color of the pasted text and selects the matching Developer Grid row
Bulk Edit:
- Bulk Edit applies the same text to an entire column at once, so you don’t have to type it row by row.
- Select the column you want to change
- Click the Bulk Edit button
- Enter the text to apply to every eligible row in that column
Bulk Edit works on the Included Topics and Description columns of the User Grid, and the Tags and Description columns of the Developer Grid. Columns that can’t be bulk-edited are left unchanged.
The entry box accepts a Tab character or spaces you need them.
Adding Text
When inside a cell, you can press the Enter key to create a new row within the cell. You may also press the Tab key to indent text.
Example shows both tabbed content and multi-rowed descriptions. The years have been tabbed, and the extra row includes additional information to the specifier about the current code year.

Adding Headers
Headers are a special type of row that can be added to the User Grid to improve organization and readability. Unlike standard rows, header rows do not contain yes/no buttons – they are purely for text and organization purposes.
Headers can help break up different types of questions and create logical groupings within your template. You can use headers to introduce a new category of questions or to provide additional context for the questions that follow.
Example: Consider a section in your specifications that contains a bracket in the middle of the sentence. You might structure it like this to maintain organization:
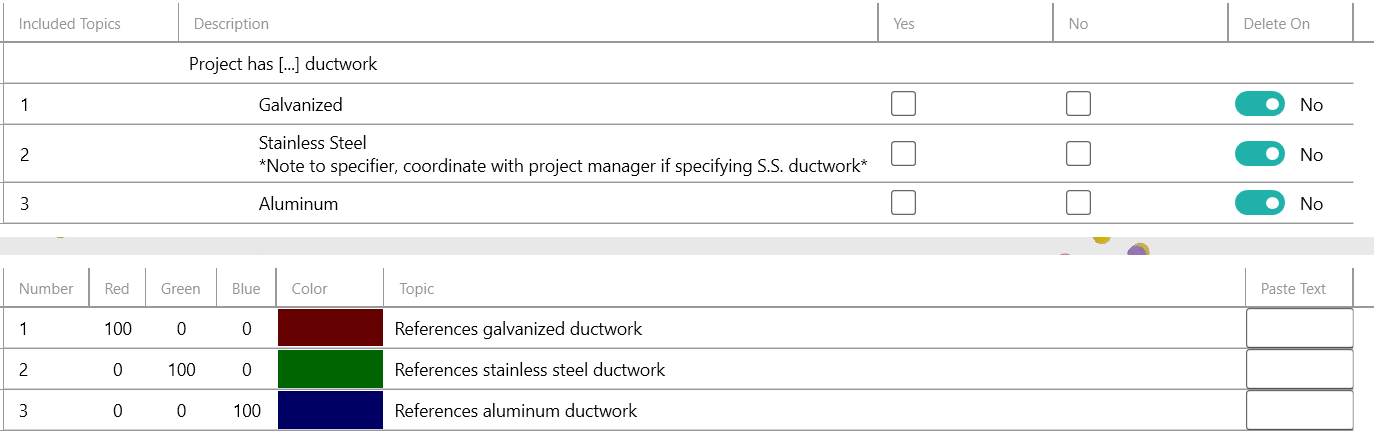
Or you may add a header to label questions that pertain to a specific specification:

This organization helps users understand the relationship between questions and makes the template more intuitive to navigate.
Adding Tabs
Tabs provide a way to further organize and segment your content within the template. Each tab could represent a different specification section or content category. This organization helps users navigate through larger templates more efficiently.
To manage tabs, use these simple controls:
- To create a new tab, click the (+) icon at the bottom of the tab bar
- To rename or delete an existing tab, right-click on the tab to access these options
When running the program, you don’t need to process each tab individually. When a user clicks the run button, ConfettiEdits automatically processes content from all tabs in the template. This saves time and ensures comprehensive document processing in a single step. Any questions left unanswered will keep their associated content in black font in the final document.
Examples:
You might create separate tabs for:
- Individual specification sections
- Different building systems
- Departmental requirements
For instance, a civil department template may have one tab for specific civil specifications. This organization helps template creators and users quickly locate and manage relevant content.

Organizing Information – Tips
Templates are the complete file that contains all your tabs, headers, questions, and color-coding information. They’re reusable configurations that you can share with your team to ensure everyone is working with the same standardized set of questions and topics.
Example: Division 22 Template, Division 23 Template.
Tabs are the highest-level organizers – they let you separate major sections of content into different pages/views within the same template.
Example: You might have separate tabs for unique specifications. 01 50 00 – Temporary Facilities and Controls, 09 90 00 – Life Cycle Activities
Headers are visual dividers within a tab that help group related questions together. They’re purely for readability and organization – they don’t affect functionality. Think of them like section titles that make long lists of questions easier to navigate.
So in practice:
- Templates provide the overall framework
- Tabs divide that framework into major sections
- Headers organize the content within each tab
You can choose which organizational tools make sense for your needs. A simple project might just need a basic template with no tabs or headers, while a complex one might benefit from using all three to keep things well-structured.
Info Button
Click the Info button to include information that may be helpful to future users answering questions. Info button dialog box supports text and images.
User Grid (While in Developer Mode)
The User Grid in Developer Mode is where you create the yes/no questions that will guide users through customizing their project specifications. Each question you create should reference topics you’ve already defined in the Developer Grid. All questions must be formatted as yes/no questions that clearly identify what content should be included or excluded from the specifications.
The Included Topics column connects your questions to the relevant topics you defined earlier. When creating a question, you’ll reference the corresponding topic number in this column. Questions can reference multiple topics by separating the topic numbers with commas.
The Delete On toggle button determines what user response triggers content deletion. When the toggle is set to “yes,” a user selecting “yes” will trigger the deletion. Conversely, when set to “no,” a user selecting “no” will trigger the deletion. Content remains in the document when the user’s selection is opposite to the toggle setting. This flexibility allows you to phrase questions in different ways while achieving the desired content removal.
Example:
In both instances, the Ohio content is deleted.

Further Examples:
A broad question like “I have windows in my project” might be followed by a specific question “I have low-e window glass in my project.” The general window question would reference all window-related topics, while the low-e glass question would only reference low-e glass content, since low-e glass is a specific type of window component.
When creating topics for this scenario, first assign one font color to all window-related information, then use a different font color for specific low-e glass information. The low-e glass question will reference only the color for low-e glass content, while the general window question will reference both colors to capture all window-related content.

Saving the Template
Yes/no questions button states, ConfettiEdits Output Locations do not get saved to the template. That is because these are determined by the user.
To save the template hit Save under the File menu. The template will go through a validation check to determine if the template can be saved. An error message will alert you with any issues and prevent you from saving the template.
Typical Error Messages:
- You cannot have two topics with the same number in the same tab. You can have the same topic number across different tabs
- You cannot reference a topic number in the user grid that does not exist in the developer grid
- Topic Numbers must be non-zero integers
- RGB values cannot be duplicated across all tabs
- Cannot use unallowed reds, blacks, or theme colors
- RGB values must be between 0 – 255
- Rows with RGB values must have a topic number
It is recommended you make backups of your template and color coded specifications.
Creating Master Specifications
After you have color-coded your specifications and finished creating your template, you’ll need to create new master specifications. First, locate the Master Specification Location field and select the location of your color-coded specifications. Then, in the ConfettiEdits Output Location field, select where you want the post-processed documents to be saved.
To generate the master specifications, go to the File menu and select Convert Specifications to Black Font. The program will create new master specifications and convert them to black text while retaining all the topic data. These master specifications should be distributed to your team, typically by storing them in a network location. The program will not overwrite any existing files during this process.
If you make any edits to your template after creating your new master specifications, you will need to republish your master specifications. The program must re-encode the data, as using new template information with earlier specifications will not process colors correctly.
Tip: If a Word document has a distinct font color, but the font color is not captured in the program, the font color will not change to black when creating new master specifications. If you see color text that you did not intend to have colored, check to make sure the color exists in the Developer Grid.
User Mode
User Mode allows team members to customize master specifications by answering simple yes/no questions. When you first open the program, it automatically loads your last-used template. To load a different template, click the File button and Open Template (Read Only). Select where the color encoded master specifications are (Source Document Location) by clicking the file icon. Select where you want your post-processed documents by clicking the file icon.
When working with questions, you only need to answer those relevant to your project. Any questions you skip will leave their associated content unchanged in the document. You can easily navigate between tabs using your mouse’s scroll wheel. Click on the Info question mark button to see any additional information regarding the question. When you’re ready, the program will process all tabs simultaneously when you click Run.
To process your documents, simply click the Run button. The program will create a new folder containing your processed files, and your original files will never be overwritten.
One useful feature is that you can process the same files multiple times with different settings, allowing for iterative editing as your project needs change. When you run the program, it will process all Word documents found in the Source Documents Location.